OFF-GRID SOLUTIONS
  • Home
  • Products
    • Victron Energy Gear
    • Victron Energy Inverter/Chargers
    • Victron Energy Solar Charge Controllers
    • Victron Energy Communications
    • Victron Energy DC Distribution
    • Batteries >
      • Victron Energy Deep Cycle Batteries
      • Victron Energy Lithium Smart Batteries
      • Victron Energy Lithium NG Batteries
    • Eccotemp Water Heaters
    • Generators
    • Pioneer Mini Splits
    • Ruuvi Sensors
  • Become a Dealer
  • Consulting
  • About Us
  • Contact Us
  • Projects

Off-Grid Updates: Remove & Replace Motor on a Dual Axis Solar Tracker

10/8/2017

2 Comments

 
Array Tech is a top global manufacturer of solar trackers. A Dual Axis Tracker follows the sun continuously, ensuring your array is always in optimum position. This can increase your power production by up to 40 % over a fixed array.

We have installed many DuraTrack DA Dual Axis Trackers and have found them to be very robust, even with the harsh environment and heavy winds we see here in Northwest Nebraska. Very minimal maintenance is needed, including lubricating the drive once a year and removing dirt or snow when needed.

​On a very rare occasion, it was necessary for us to replace the motor for a customer's tracker. Installing a new motor on a solar tracker might seem a little daunting, but it’s really quite an easy task if you follow the steps below. Instructions will come with your new replacement motor, however, we added a few steps and more pictures, to hopefully make replacement that much easier.
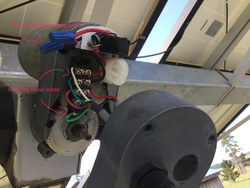
PictureTerminal block
  • Shut down power to the system - Very Important Step!
  • Remove cover on motor.
  • Loosen the plastic wire nut that seals the wires off.
  • Pull off the back motor cover with a T25 torx.
  • Take a picture of the wiring on the terminal before removing all wires except the two on the very top.

  • Take off the bolts holding the motor collar onto the gearbox - the motor will slide right out.
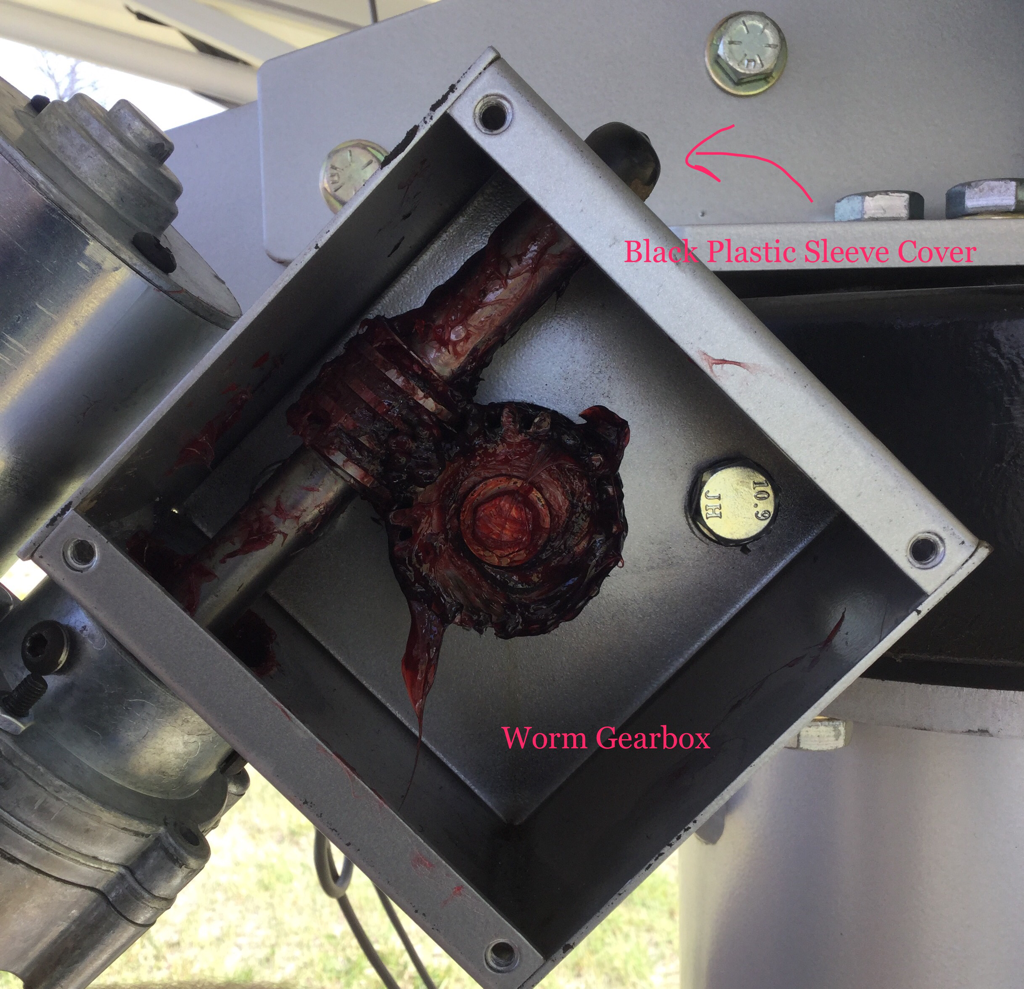
  • Remove the cover of the worm gearbox (located behind the motor).
  • Remove the black plastic sleeve cover on the very back of the worm gearbox.
  • Remove the sleeve attached to the back of the gearbox (where the tip of the worm gear sits) and replace with new one.
  • Grease the gear in the gearbox liberally.
  • Grease the worm gear attached to the motor liberally and slide back in place just as you removed the old one.
Picture
Worm gearbox
  • Secure the bolts to keep it in place.
  • Remove the back cover of the new motor and slide the wire through the plastic wire nut.
  • Wire exactly as they were on the old motor...refer to your picture.
  • Secure the cover of the worm gearbox.
  • Reconnect power to your system.
  • Set your controller to the Manual position.
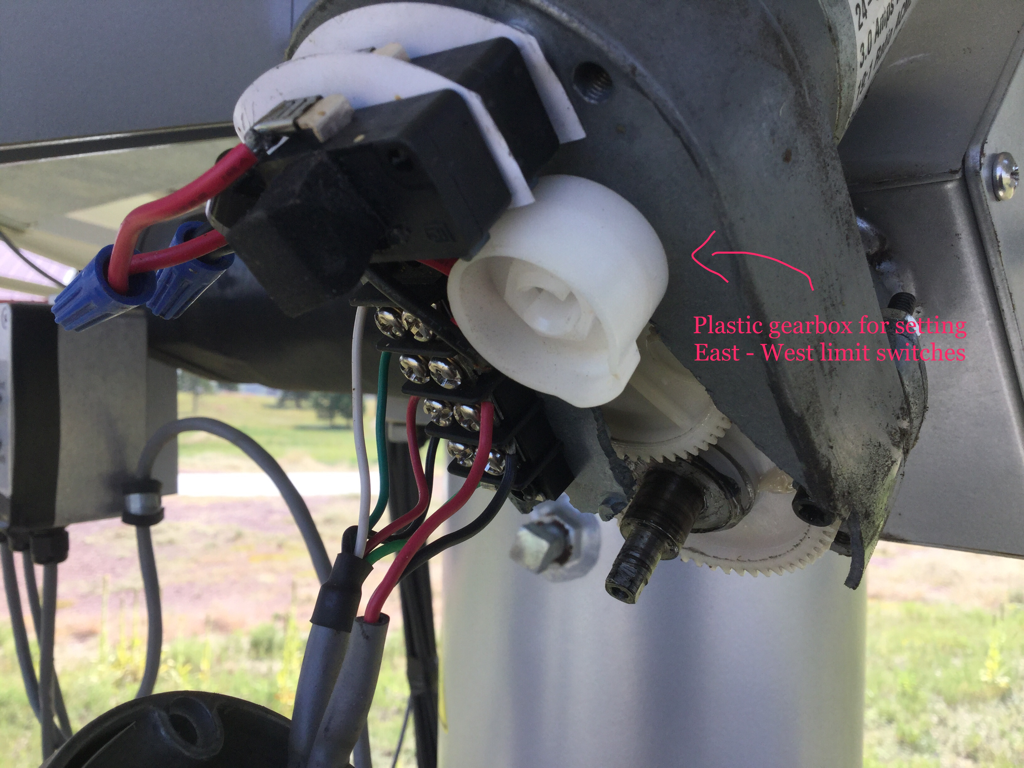
  • Set the limit switches to the East by using the white plastic gears. The back gear will control the East limit. Manually run the tracker to the East while moving the gears in unison. Use a flat head screwdriver if needed.
Picture
East - West limit gears
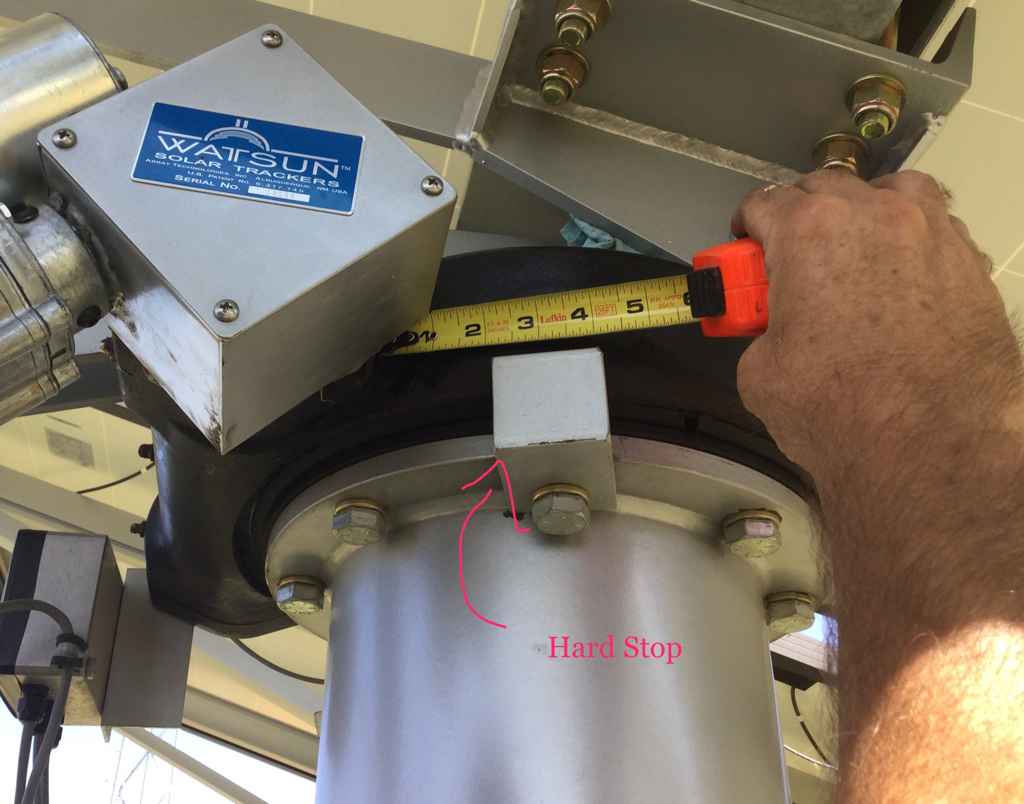
  • Stop the tracker when the hard stop is 2 - 3 inches from the corner of the slew ring.​
Picture
Setting East - West limits
  • Manually run the tracker to the West, ensuring it stops when the hard stop is 2 - 3 inches from the corner of the slew ring. Use the front, white plastic gear to adjust the stop, as done with the East limit switch.
  • Put the back cover of the motor on and the rubber boot as well.
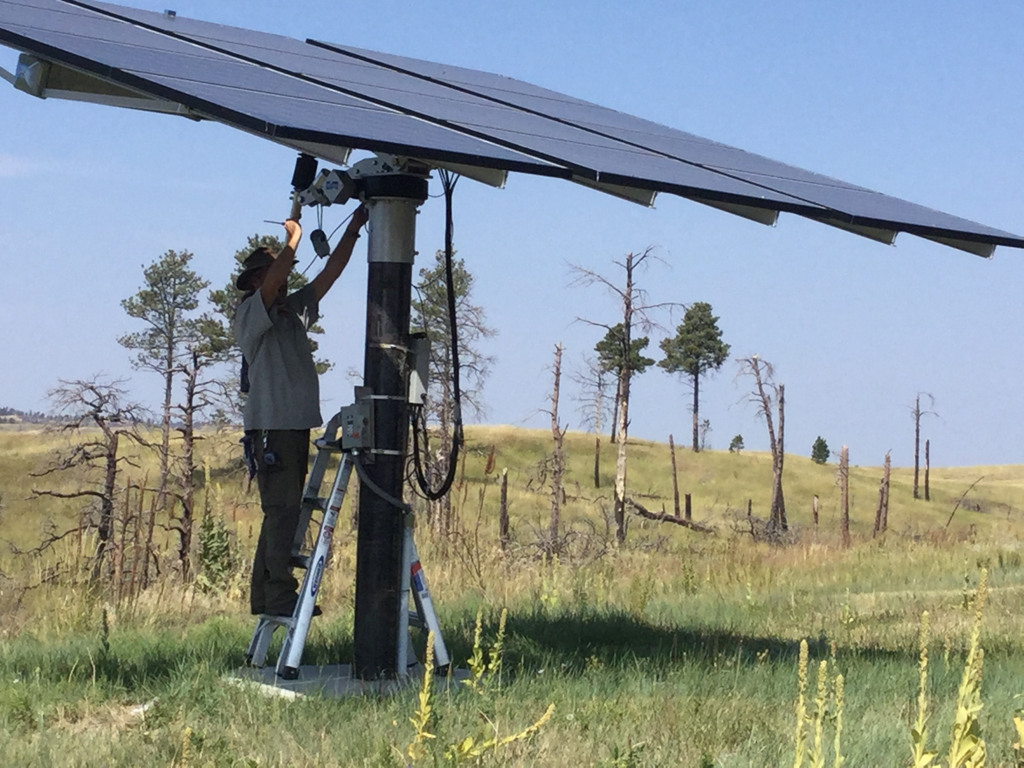
  • Double check the East - West stops by manually running the tracker in both directions to ensure the tracker stops have been set appropriately.
  • Set the tracker to Automatic and let it follow the sun.
Picture
Double checking East - West limits
2 Comments
Best Rehab in tennessee link
12/12/2023 10:35:32 pm

This post was a great read, providing a well-rounded overview of the subject with valuable insights and practical takeaways.

Reply
BRAND IDENTITY DESIGN link
12/19/2023 01:34:55 am

I found the real-world examples provided in this post to be particularly helpful in understanding the concepts discussed.

Reply


Leave a Reply.

    Author

    Marc and Lisa live off-grid and have worked in the Renewable Energy industry for over 10 years. Their passion is to provide knowledge and resources to help people live a more sustainable life.

    Archives

    April 2019
    March 2018
    February 2018
    October 2017
    September 2017

    Categories

    All
    Renewable Energy
    Solar Cooking

Powered by Create your own unique website with customizable templates.
  • Home
  • Products
    • Victron Energy Gear
    • Victron Energy Inverter/Chargers
    • Victron Energy Solar Charge Controllers
    • Victron Energy Communications
    • Victron Energy DC Distribution
    • Batteries >
      • Victron Energy Deep Cycle Batteries
      • Victron Energy Lithium Smart Batteries
      • Victron Energy Lithium NG Batteries
    • Eccotemp Water Heaters
    • Generators
    • Pioneer Mini Splits
    • Ruuvi Sensors
  • Become a Dealer
  • Consulting
  • About Us
  • Contact Us
  • Projects